UWP Community Toolkit 1.3がリリースされてました
UWP Community Toolkit 1.3がリリースされてました。 V1.2/V1.3で色々と便利なコントロールが追加されているので、 ざっとめぼしい部分を見繕って、使い方をまとめておこうと思います。
MasterDetailView
MasterDetailsView - UWPCommunityToolkit
これは、V1.2で追加されていたコントロールです。
よくある、Master-DetailパターンなUIを簡単に実現するためのコントロールです。
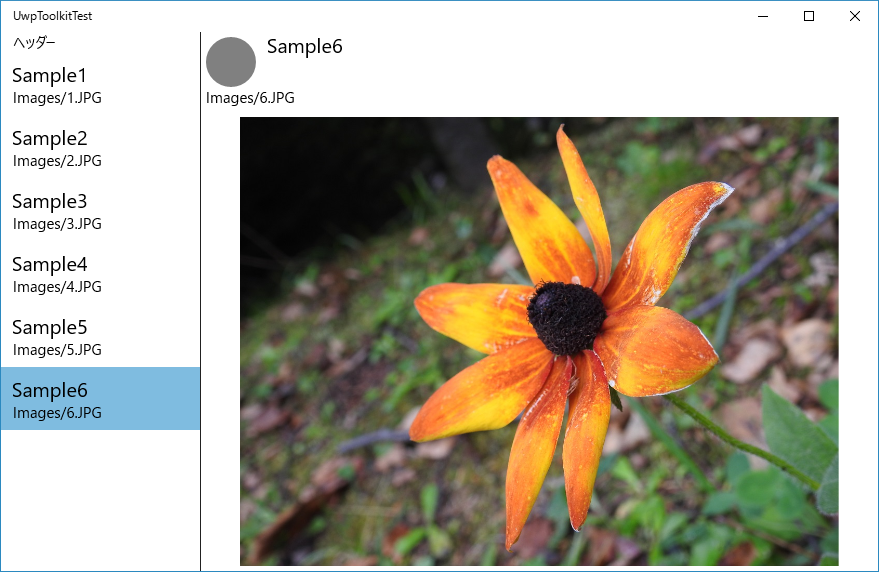
ItemTemplateで、Master側のリスト表示のテンプレートを設定し、
DetailsTemplateで、Detail側の各項目を詳細表示する部分のテンプレートを設定します。
MainPage.xaml
    <Page.Resources>
        <DataTemplate x:Key="ListTemplate" x:DataType="local:MenuItem">
            <StackPanel Margin="0,8">
                <TextBlock Style="{ThemeResource SubtitleTextBlockStyle}" Text="{x:Bind Title}" />
                <TextBlock Text="{x:Bind ImagePath}" />
            </StackPanel>
        </DataTemplate>
        <DataTemplate x:Key="DetailsTemplate" x:DataType="local:MenuItem">
            <Grid>
                <Grid.RowDefinitions>
                    <RowDefinition Height="Auto" />
                    <RowDefinition />
                </Grid.RowDefinitions>
                <RelativePanel Margin="5">
                    <Ellipse x:Name="FromEllipse" Width="50" Height="50" Fill="Gray" />
                    <TextBlock Margin="12,-6,0,0"
                               RelativePanel.RightOf="FromEllipse"
                               Style="{ThemeResource SubtitleTextBlockStyle}"
                               Text="{x:Bind Title}" />
                    <TextBlock RelativePanel.Below="FromEllipse" Text="{x:Bind ImagePath}" />
                </RelativePanel>
                <Image Grid.Row="1" Margin="5"
                       Source="{x:Bind ImagePath}"
                       Stretch="Uniform" />
            </Grid>
        </DataTemplate>
    </Page.Resources>
    <Grid Background="{ThemeResource ApplicationPageBackgroundThemeBrush}">
        <controls:MasterDetailsView ItemsSource="{x:Bind List}"
                                    ItemTemplate="{StaticResource ListTemplate}"
                                    DetailsTemplate="{StaticResource DetailsTemplate}"
                                    MasterHeader="ヘッダー"
                                    MasterPaneWidth="200"
                                    NoSelectionContent="要素が選択されていません"/>
    </Grid>
MainPage.xaml.cs
    public sealed partial class MainPage : Page
    {
        public ObservableCollection<MenuItem> List { get; set; }

        public MainPage()
        {
            this.InitializeComponent();

            this.List = new ObservableCollection<MenuItem>()
            {
                new MenuItem("Sample1", "Images/1.JPG"),
                new MenuItem("Sample2", "Images/2.JPG"),
                new MenuItem("Sample3", "Images/3.JPG"),
                new MenuItem("Sample4", "Images/4.JPG"),
                new MenuItem("Sample5", "Images/5.JPG"),
                new MenuItem("Sample6", "Images/6.JPG"),
            };
        }
    }

    public class MenuItem
    {
        public string Title { get; set; }
        public string ImagePath { get; set; }

        public MenuItem(string title, string path)
        {
            this.Title = title;
            this.ImagePath = path;
        }
    }
これは便利!!
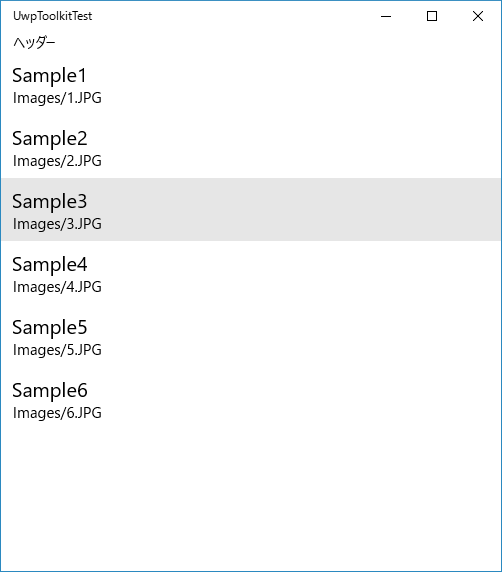
しかも、画面幅が小さくなった場合には、こんな風にMaster/Detailのそれぞれを同時に表示するのをやめて、リストの各要素を選択したらDetailにページ遷移するような動作に切り替わります。
| リスト表示 | 詳細表示 |
|---|---|
 |
 |
各種プロパティなど
MasterDetailViewの各種プロパティはこんな感じ
| プロパティ名 | 型 | 内容 |
|---|---|---|
| ItemsSource | object | ListBoxなどと同じように、表示する要素のリストをここで設定します |
| SelectedItem | object | 選択された要素を取得または設定します |
| ItemTemplate | DataTemplate | Master側の領域のリスト表示用のテンプレートを設定します |
| DetailsTemplate | DataTemplate | 選択された要素を表示する領域のテンプレートを設定します |
| NoSelectionContent | object | 選択された要素が何もないときの表示内容を設定します |
| NoSelectionContentTemplate | DataTemplate | ↑の表示時のテンプレートを設定します |
| MasterPaneWidth | double | Master側の領域の幅を設定 |
| MasterPaneBackground | Brush | Master側の領域の背景色を設定 |
| MasterHeader | object | Master側領域のヘッダーを設定 |
| MasterHeaderTemplate | DataTemplate | ↑のテンプレートを設定 |
WPFでもこんなの用意しておくと、色々と便利に使えそうですよね。 こんどWPF用にこのコントロールを再現してみようかな。。
Loading
これも結構使いそう。
http://docs.uwpcommunitytoolkit.com/en/master/controls/Loading/
こんな風に、ローディング時のオーバーレイ表示をするコントロールです。
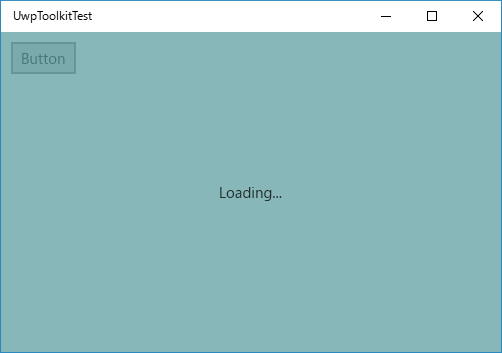
IsLoadingプロパティで、ローディング表示のオン/オフを切り替えます。
以下のサンプルでは、ボタンを押したらイベントハンドラ内でLoadingコントロールのIsLoadingプロパティを変更して3秒間だけローディング表示をおこなっています。 MainPage.xaml
    <Grid Background="{ThemeResource ApplicationPageBackgroundThemeBrush}">
        <Button Margin="10"
                HorizontalAlignment="Left"
                VerticalAlignment="Top"
                Click="Button_Click"
                Content="Button" />
        <controls:Loading x:Name="LoadingControl"
                          HorizontalContentAlignment="Center"
                          VerticalContentAlignment="Center"
                          d:IsHidden="True"
                          Background="CadetBlue"
                          Opacity="0.75">
            <TextBlock Text="Loading..." />
        </controls:Loading>
    </Grid>
MainPage.xaml.cs
        private async void Button_Click(object sender, RoutedEventArgs e)
        {
            this.LoadingControl.IsLoading = true;
            await Task.Delay(3000);
            this.LoadingControl.IsLoading = false;
        }
MarkdownTextBlock
http://docs.uwpcommunitytoolkit.com/en/master/controls/MarkdownTextBlock/
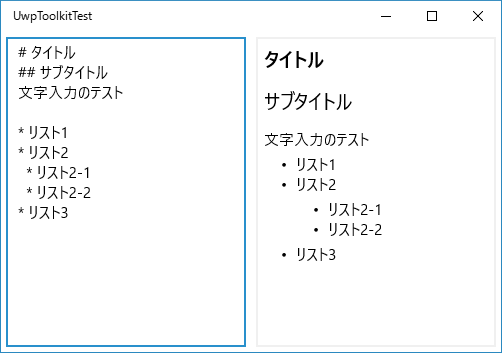
マークダウン形式のテキストデータを、整形して表示してくれるコントロールです。
これを使えば、簡単にMarkdown用のエディタを作ったりできそう。
Textプロパティに、Markdown形式の文字列を渡すだけで使えるので、↓みたいにTextBoxのプロパティとバインドするだけで、Markdownのプレビュー表示ができます。これは楽しい!!
    <Grid Background="{ThemeResource ApplicationPageBackgroundThemeBrush}">
        <Grid.ColumnDefinitions>
            <ColumnDefinition />
            <ColumnDefinition />
        </Grid.ColumnDefinitions>

        <TextBox x:Name="txtMarkdownSource" Margin="5"
                 AcceptsReturn="True" />

        <ScrollViewer Grid.Column="1"
                      Margin="5"
                      BorderBrush="{ThemeResource AppBarBorderThemeBrush}"
                      BorderThickness="2"
                      HorizontalScrollBarVisibility="Disabled"
                      VerticalScrollBarVisibility="Auto">
            <controls:MarkdownTextBlock Margin="6"
                                        Foreground="Black"
                                        Text="{Binding Text, ElementName=txtMarkdownSource}" />
        </ScrollViewer>
    </Grid>
ちなみにV1.3だと、テーブル記法がうまく表示されなくなっているようです。
ですが、以下のようなプルリクが出ていたので、そのうち修正されるかな、、と思います。
https://github.com/Microsoft/UWPCommunityToolkit/pull/989
Expander
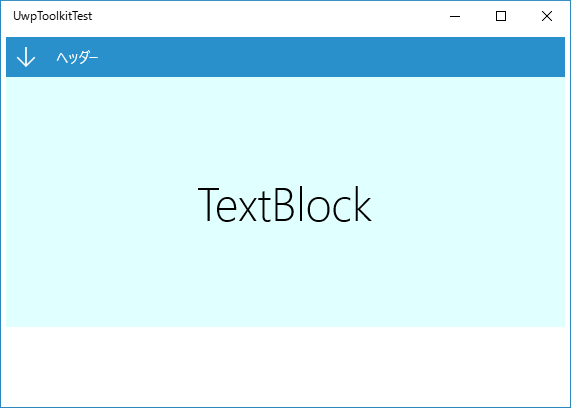
http://docs.uwpcommunitytoolkit.com/en/master/controls/Expander/ WPFのExpanderと同じようなコントロールです。
IsExpandedプロパティで、子要素を表示したり折りたたんだりできます。
        <controls:Expander Margin="5"
                           HorizontalContentAlignment="Stretch"
                           Header="ヘッダー"
                           IsExpanded="True">
            <Grid Height="250" Background="LightCyan">
                <TextBlock HorizontalAlignment="Center"
                           VerticalAlignment="Center"
                           Style="{StaticResource HeaderTextBlockStyle}"
                           Text="TextBlock"
                           TextWrapping="Wrap" />
            </Grid>
        </controls:Expander>
| プロパティ名 | 型 | 内容 |
|---|---|---|
| IsExpanded | bool | 子要素を表示するか、折りたたむかを設定 |
| Header | string | ヘッダーの文字列を設定 |
| HeaderTemplate | DataTemplate | Header要素のテンプレートを設定するためのプロパティ |
WrapPanel
というか、ほぼまんまの雰囲気なので説明は省略します。
SurfaceDialTextboxHelper
http://docs.uwpcommunitytoolkit.com/en/master/controls/SurfaceDialTextboxHelper/
TextBoxをSurface Dial対応にするためのヘルパーも用意されています。
実物持ってなくて試せないので、これも省略。
Surface Dial欲しいなぁ・・・